

One of the most complex tasks undertaken during Passion’s refit was the complete replacement of her auxiliary power system—engine, V-drive and fuel tanks. I needed more horsepower, which drove the need for more fuel capacity and a larger V-drive to handle the higher engine output. I began my search for a new engine by developing a list of requirements which included:
1. Easy worldwide parts availability
2. Low-cost parts
3. Easy to self-service
4. Quiet operation
5. Easy to prime
6. Strong technical and customer service support
My search for a new engine then moved to the fall/winter boat shows, where I visited every engine manufacturer offering a diesel in my horsepower range. The top three requirements quickly limited my search to marine engines based on a Kubota block. Kubota is the world’s largest manufacturer of small (under 75hp) diesel engines, and parts are available from tractor and industrial suppliers worldwide. Since they end up powering machinery in some very remote locations, they are designed to be easy to service and have a reputation for reliability.
Next, I talked to other Pearson 40 owners about their repowering experience. While a wide variety of engine manufacturers had been selected over the years, Beta Marine seemed to be the most popular, and their owners loved them. I had also already pestered Stanley Feigenbaum and Farron Peffer from Beta Marine for endless hours at the shows, and they were always helpful, supportive and educational, and that clinched it.
After I decided to go with the Beta 50, Stanley and Farron also helped me select the correct new Walter V-drive, verify that my existing shaft was sufficient for the more powerful engine and that all the new couplings, flanges and Drivesaver were correct.
The last steps were to customize the engine mounts for add-on equipment, like a compressor and bilge pump, as well as choose other options, such as a remotely mounted oil filter. Beta offers many optional and custom features, and Stanley, Farron and I discussed them all before finalizing my order, which was sent to the factory in the UK where the engine would be custom-built to my specifications.
That done, and while waiting for the new engine to arrive, I turned my attention to removing the old one, along with the V-drive, fuel tank, surrounding cabinetry and the original engine and V-drive beds. Because the larger V-drive required that the latter be relocated, that meant the engine needed to be moved slightly aft as well, which in turn necessitated new ones for the engine as well.
FUEL THOUGHTS
While all this was going on I also began planning for additional fuel capacity. Using the engine specs for the Beta 50, I determined I wanted to upgrade from the original 46 gallons of fuel to 100. Since diesel fuel weighs approximately 7lb per gallon, we’re talking about 700lb in all, which requires some careful thought regarding the tank’s location—or as it turned out in my case, the location of two tanks. You can’t put 700lb just anywhere on a boat, because it will have a significant impact on trim, both fore and aft, and athwartships.
My weight distribution calculations also needed to include any other new heavy equipment I was contemplating, like the 195lb generator I was building. With a little creativity I was ultimately able to come up with a two-tank solution, with a 20gal tank and the generator installed on the starboard side and a 78gal tank to port. The balance was nearly perfect.
I now needed to move quickly in order to have the tanks fabricated and installed before the engine arrived. One little known fact is that to be legal, marine fuel tanks must not only be built to ABYC and USCG specs but also pressure tested. I have now used the same marine fabricator, JTR Enterprises, in Gulfport, Florida, on three different boats over 35 years. For three generations the Dudinsky family and JTR have been premier marine fabricators and builders of ABYC/USCG spec tanks. During the heyday of boatbuilding on the west coast of Florida, (think Morgan, Endeavour, CSY) JTR supplied many of the industry’s stainless and aluminum fabrications.
When I contacted JTR to discuss tank materials, venting, fuel lines, filler pipes and mounting, their recommendation was to use aluminum, because properly coated and cared-for, aluminum tanks will outlast stainless and have far greater strength than plastic. Using JTR’s input I sthen ketched out the design for the two tanks and JTR went to work. One caution from JTR was to make absolutely sure that the finished tanks, not just the ends, would fit through the hatch and could be maneuvered into place once below. Following this recommendation, I built a simple cardboard and wood batten mockup. Thankfully the larger, nearly 6ft-long tank fit, although with only a couple of inches to spare.
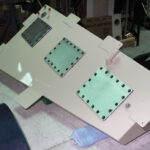
For peace of mind, ease of cleaning and protection, the new tanks were painted before installation
ENGINE BAY RETHINK
The next task was to design and install the new beds for the engine and V-drive. Because they would glassed directly to the hull, they needed to be in place before any other structures or tanks were put in. I had never installed an engine nor engine beds before, so I fell back on my tried and true method for any new and complex construction: making full-sized plywood and foam-core mockups. Using these mockups I was then able to determine the position, angle and heights of the new beds. I was also able to ensure there would be no clearance issues above, below or beside the new engine. Finally, the mockups allowed me to fabricate foam and plywood patterns for the beds that I then temporarily glued to the hull to act as molds. After that, it was a relatively simple task to lay up fiberglass over the patterns to create new beds. Once cured, the rough bed glasswork was cut and ground to size, and I was ready to install the tanks, after first prepping and priming them with Awlgrip epoxy primer, followed by an Awlgrip topcoat.
The first tank to go in was the larger one. While the large tank could easily be lifted by two people, it was extremely awkward to handle, and I ended up enlisting four more friends to maneuver it below. Eventually, we positioned it in its new location to port of the new engine beds and temporarily blocked and wedged it into place. I then patterned and installed new bulkheads to permanently retain the tank and also form the port side of the engine compartment. It had been designed so that the port engine compartment bulkhead would 3in farther outboard from the original bulkhead, dramatically improving engine access for maintenance. After that, I installed the starboard engine compartment bulkhead. That done, it was time for the new engine and V-Drive.
Although, we had craned out the old Westerbeke, by the time I was ready to install the new engine there was a pipe and fabric shelter over the boat. Therefore, to move the engine up and into the boat, we fitted a steel I-beam and chain fall hoist on a trolley underneath the peak of the shelter. The Beta was then lifted off the ground and rolled along the I-beam until it was over the companionway, where we lowered it into place. Using this setup it was very easy to get the engine down on the beds. The V-drive followed a similar path along the beam and quickly found its new home.

After bolting the engine and V-drive to the beds, I began the process of wiring the engine and plumbing the water, fuel and the exhaust system. One very important tip—if you use a standard water-lift muffler in the exhaust system, make sure you do the calculations to ensure that water from the exhaust hose can’t flow back and overfill the muffler. When you shut down the engine any water in the hose can flow back into the muffler and if that volume of water is greater than the muffler can hold, that water can potentially be forced back up into the exhaust manifold allowing water into the engine. My installation required two water-lift mufflers to handle the total volume of water that could be in the exhaust hose.
With the repower finished, and even though it would be years before Passion hit the water, I just couldn’t wait to test the installation. I carefully checked all the systems, added fuel to a tank and primed the fuel system. Then, using a 5-gallon bucket and garden hose to supply water and while holding my breath, I pressed the starter button. The Beta sprang to life on the second try. I could breathe again! What I felt would be the most difficult task of the refit was complete and had met with complete success.
Eight Bells: Sadly, Chip Lawson passed away on board his beloved Passion as this issue was going to press.
June 2019


")


