
I was in the café at West Bay Marina in Olympia, Washington, on a damp, chilly fall morning, and my buddies and I were assembled for our morning briefing on what’s going on and what’s not going on. After a few jokes that were funny only to old men, we narrowed the focus to what we were trying to get done on our boats and where we’d like to go before it gets too cold. As we did so I had one thing on my mind: getting a cabin heater installed on the boat without taking all winter to get the work done, at the same time keeping costs to a minimum. I’m happy to say I managed to do both. Here’s how.
HEATED QUESTIONS
Diesel and propane, under pressure, deliver steady heat through a burner, but you give up space on deck for tank racks and lockers. You also have to tap into fuel lines, mount pumps and give up precious space in the cabin. Bottom line: my boat was not going to offer itself up easily to this upgrade. Holes for ducting through five bulkheads and/or cabinets would be required, some achievable only with a right-angle drill deployed while flat out on my tummy. Suddenly, I was rather looking forward to tossing something into the firebox from time to time, like the old days, to keep the fire up.
Given this reality, I chose a Newport/Dickinson solid-fuel unit, which runs on wood or charcoal, and which I would rather refer to as a furnace. It’s less complicated than diesel or propane, and extremely efficient because the firebox is made of stainless steel sheet metal, which radiates dry heat quickly. At about 14lb, it can also be mounted to a bulkhead without heavy bracing or bolting, making it a definite value-add upgrade to the boat.
FLAMING OUT
A wise man will humble himself before the installation manual. I took license where it was necessary and still achieved safe and effective results.
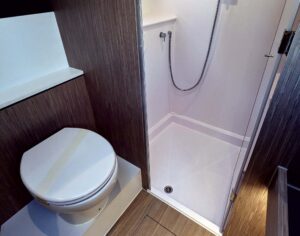
In my boat, the furnace would be bolted to the bulkhead at the forward end of the cabin. There needed to be plenty of clearance for anyone passing by to the head, and it should not be underfoot or too close to the dinette, since I wanted to sit at the table and look across to see the flame in the firebox.
I had to decide where the chimney should exit the deck. I did not want it under the boom or interfering with the vang or jib sheets. It also must not be vulnerable to being hit or used as a place to grab in an emergency. I chose an exit point slightly off centerline and far enough aft of the mast that it wouldn’t get in the way.
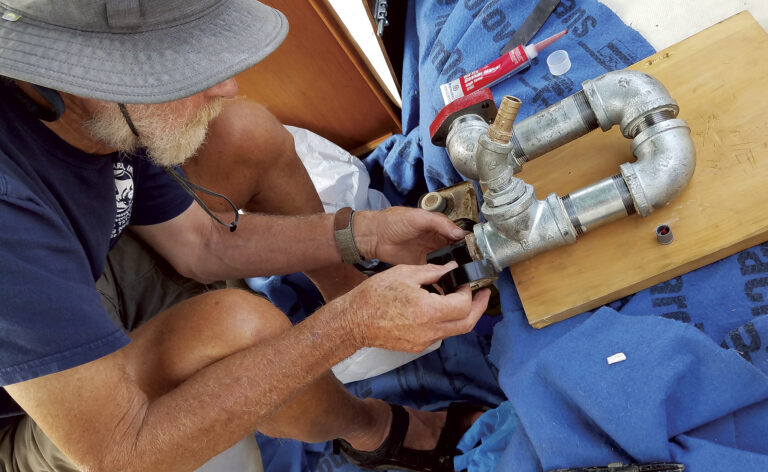
Once in position, the furnace and chimney dictate the length and shape of the flue pipe. Of course, the ideal is that the flue pipe is long and straight, but mine must turn to reach the exit point in the deckhead, hence some elbows. The directions call for a 1in clearance all around the flue pipe as it passed up through the deck.
The furnace is made of two parts: The inner part—the fire box—is separated from the outer enclosure, so that air passes in between. Very little heat generated in the firebox reaches the exterior surface of the furnace, so even if you are thrown against it in a seaway you are not likely to injure yourself. The part that does get too hot to touch is the flue pipe, especially the first few inches at the top of the furnace. A 10-gauge custom-cut stainless steel heat shield attaches to the bulkhead to protect the varnish, but I need not have been overly concerned because no significant heat from the fire box reaches it. Nevertheless, it adds a handsome framing feature.
While the Dickinson heater is out-of-the-box bolt-on ready, the deck base for a chimney is not included and may have to be custom made. (The flue pipe, elbows and chimney parts are also not included; plan in advance for what you’ll need.) Before installing, decide upon a reference to vertical—this is important for appearance. Hans, my woodshop friend, glued up some Sapele with a biscuit in the joint using his Old World shop skills to create an easy-looking base with a 12-degree contour.
The straight flue pipe sections and elbows telescope into one another—allow about two extra inches for a tight socket-like fit. A good seal and rigidity at the joints can be had with temperature-resistant flue tape from the hardware store.
BURNING FAN
I use Coghlan’s brand fire starter sticks to get things going. Hikers may be familiar with compressed trioxane, a three-wafer foil pack available for about a buck at Army surplus stores and on the internet. Don’t use barbecue fluid.
Running a solid fuel heater, as with diesel or propane, calls for precautions: not just anyone should be allowed to operate the furnace. Be warned that more fresh air than you imagine must enter the boat to fuel any furnace, more yet if you run your diesel at the same time.
A long, straight flue pipe optimizes the speed (draft) of the exhaust gases and helps overcome down-drafts. Do not overload the firebox. Two or three pieces of charcoal briquettes, or two ladles of pellets, for example, are good to start with.
Do not run the heater with any sort of boat cover in place. Wind working on a boat cover or even a partial tarp causes a bellows-like action that will cause a downdraft. The directions also call for a carbon-monoxide alarm and a barometric damper.
What my wife likes about our furnace is that not too much can go wrong with it. I wouldn’t walk away from the boat with a blazing fire in the box, but there are also no valves or switches to accidentally forget. The fire is safe and will eventually go out by itself.
When we climb down into the cabin on a chilly sun-break morning, pushing off for the weekend, I light the furnace and turn on our overhead cabin fan to improve belowdecks circulation. By the time the “tea and cakes” are ready the cabin is shirtsleeve wonderful.

What to Burn
The manufacturer lists the following fuels. Always read the cautionary labels on any products that you use.
Charcoal briquettes: A 12lb bag costs about $10.00 and produces a big smoky flame at first but dies down to the long-lasting glow of a July barbecue.
Kindling: A $2.50 bundle gives a romantic yellow flame, but burns away quickly. Saw the sticks down to about 4in. The aroma is reminiscent of a campfire.
Pellets: At about $3.00 for a 25lb bag these make for the cheapest and hottest fire. Start with a soup-ladle-sized pile and add small amounts later. The flat and perforated firebox tray allow the pellets to spread out, but some drop through the holes to the ash drawer. More effective would be a cup-like affair to hold the pellets together. I laid a piece of wire screen down on the fire tray.
Coal: Although not available where I live, a 6lb bag of bituminous bought online at coalforsale.com costs $12.00. (Shipping is free.) Coal burns very hot for a long time, but is reluctant to start, smokes and emits an odor I found unpleasant. It works best when I position a chunk or two on top of an already full-on fire.
Presto logs: I find these impractical to saw into slices or to store onboard.
Peat: Peat is decomposing organic matter that becomes inflammable when dried.Major Peat users are Finland, Ireland, Russia and Sweden.
Another fun alternative not listed by the manufacturer is small tree cuttings. My wife has noticed to her delight that lately the trees around our house are freshly pruned. Cherry saplings, in particular, yield a hot flashy pop and crackle fire and get me a honey-do credit.
We cruise Puget Sound hanging out on charcoal briquettes and cuttings from home. Recently my wife also tried Sterno brand canned alcohol, which provides an instant flame, steady heat and is readily available at $4.50 can. It’s expensive but lasts for more than a couple of hours. No tending-to, no smoke, no ashes, nice bluish yellow flame, no worry about overloading the firebox, no noticeable humidity, no degradation of the fuel in storage. You can also stop this flame at any time by sliding the lid back over the can and then relight later.
Approximate costs:
Dickinson Solid Fuel Heater: $500
Two sections 3in flue pipe: $70
Two elbows: $75
Deck cap: $100
Thru deck pipe fitting: $60
Fasteners/Expendables/flue tape: $40
TOTAL:$845
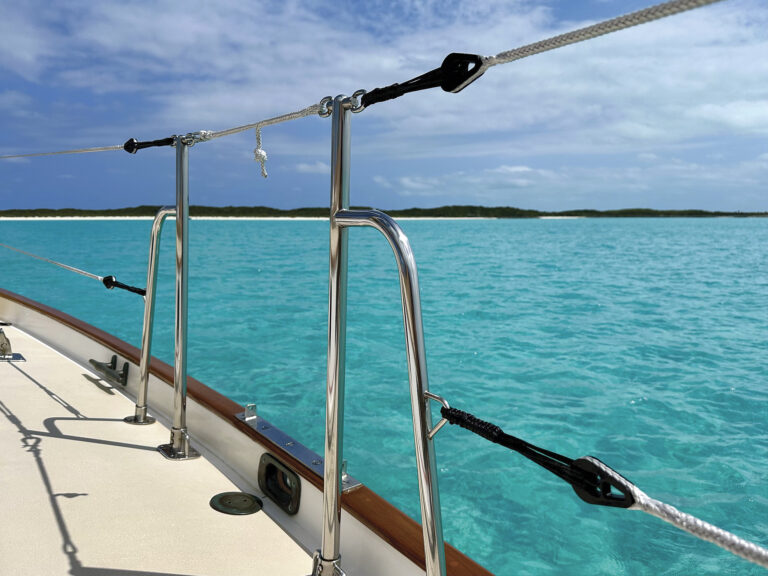
The cost of the bulkhead heat shield and the wooden deck base were custom to my application and thus not included. For protection, a 1/2in stainless steel rail running across the deck above the chimney was added later.
Skills: Moderate
Installation time: 5 hours.
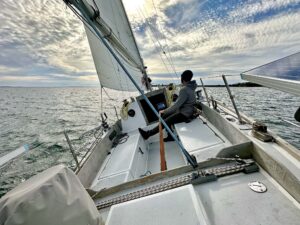
Photographer/writer John Arrufat sails his 33ft Cape Carib ketch out of Portland, Oregon