When it comes to securing the hull to the deck, which method is the best?
My wife’s parents should have named her Prudence. “Tack,” she urged again, in opposition to my plan to shoot up into the wind at the last minute, just long enough to squeak past the deep side of a steel channel marker. Granted, it was a bad plan in a 3-knot cross current. What followed was a moment of enlightenment and a new appreciation for the strength of a well-executed hull-to-deck joint.
Early fiberglass sailboats had their molded decks mated edge-to-edge with the hull, perhaps with a bit of resin slurry to perfect the joint, then tabbed inside with fiberglass mat. Many of these boats are still sailing, but any that are dry inside have had major reconstruction on this joint. To make a less permeable seal, boatbuilders soon incorporated molded flanges into hulls, decks or both, that allowed the joint to be fastened mechanically. It also provided adequate surface area for a gasket or sealant to make the joint watertight. And with developments in technology, some builders simply use high-tech adhesives. So, which is the best way to keep the water out?
Types of Flanges
By far the most prevalent type of hull-to-deck joint today is based on an inboard flange on the hull. This is at first a little surprising, as adding an inward-turning feature to the hull necessitates a split mold and some challenging laminating, but beyond the tooling and layup issues, the inboard flange has some distinct advantages. It provides for the least conspicuous joint, allows the flange to be as wide as the size of the boat requires, places the joint inboard and out of harms way, and the fasteners are vertical, making the forces on them mostly shear rather than tensile.
An inboard flange makes for easy assembly and sealing, but it complicates fastening. If bolts are used, the nuts are inside the boat, making tightening a two-person job. Some builders have avoided this issue by fastening the flange with screws or pop rivets. Others mold a metal bar into the flange that can be tapped to serve as both nut and backing plate. Today, some builders rely entirely on modern, high-tech adhesives.
The raw edge of the deck might fit into a molded rabbet in the flange. More often it is hidden beneath a toerail with an L-shaped base. A toerail at the joint stiffens it, and if the fastenings for such a rail pass through the joint, they increase resistance to separation.
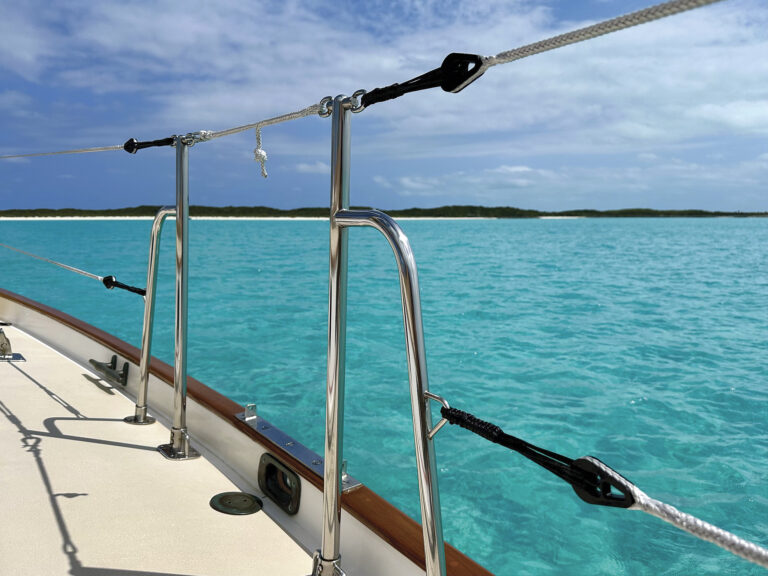
While the inboard joint is discreet, the defining descriptor for the joint with an outboard flange is the fact that the joint is exposed. So why do boatbuilders choose this option? Cost. Giving a composite hull an outboard flange is simply a matter of making it a feature of the mold at the top. Plus, the outboard flange puts both ends of the fasteners outside, simplifying the assembly process.
As the joint of choice for boats competing on price, an outboard flange is often viewed as a sign of cheap construction. That is too bad, because it has a singular advantage—it protects the topsides from unwanted contact. Even being ugly turns out to be a virtue, because it forces the builder to conceal it with a rubber, metal or wooden cap. The result is a robust rub strake, a glaring omission on too many boats with inboard flanges. This inherent strake might be given a more advantageous location by mating it with a deck molded with a downward turn above a matching outboard flange. The deck might also turn upward to create a molded bulwark with the outboard joint hidden beneath a cap rail.
The outboard flange is as easy as the inboard flange to mate and seal, and easier to fasten. As with the inboard flange, stresses on fasteners are primarily shear. An outboard flange offers the additional benefit that the fastener holes do not penetrate the interior of the boat. A practical limit on width makes this joint less suitable as the size of the hull increases, but for smaller boats there’s a lot to like about the outboard flange.
A third option is to mold a down-turned flange into the deck so it slips like a shoebox lid over the outside of the vertical top of the hull. This design allows the deck to act like a shingle covering the top of the hull. To breach the joint water must be forced up from below, which is surely an advantage, at least until you bury the rail. Then there is no down or up, only out or in.
Push on the side of a closed shoebox, however, and you will see one potential failing of this type of deck joint. Because the joint is vertical, an impact to the hull tends to open it. To resist this, boats assembled with a shoebox joint often incorporate an interior sheer clamp—a reinforcing stringer—to stiffen the hull at the joint location. In addition, the joint is likely to be bonded rather than caulked.
The theory is that unlike mechanical fastening, bonding distributes the load evenly, making for a stronger joint. The reality depends on the quality of the bond. With the shoebox joint, there is a rub, which is, well, the rub. As the deck flange slides down over the hull during assembly, it scrapes at whatever adhesive or sealant that has been applied. The result is inherent uncertainty about the continuity of the bond, which compromises how watertight the joint might be. A hull flange provides a superior platform for a watertight bond.
Adhesives and Mechanical Fasteners
Boat manufactures are increasingly relying on high-strength methacrylate adhesives to fuse the hull and deck into a single, leak-proof component, in some cases omitting mechanical fasteners altogether. Joint strength is impressive, and two decades of excellent real-world experience suggest that this is a proven technology, albeit an expensive and exacting one. Consequently the vast majority of boats still rely on some type of flexible sealant to seal the hull-to-deck joint. The default choice is a polyurethane adhesive (such as 3M 5200), but older boats may have butyl rubber tape or even organic putty in the joint.
Where flexible sealant has been used, mechanical fasteners provide the structural strength. They also maintain the seal—or not. The type, size and spacing of the fasteners all have implications for the integrity of the joint.
Thankfully, the bad old days of pop-riveted deck joints are gone, at least for sailboats, though there are still lots of these boats around. Pop rivets are alloyed to distort during installation, so it is just wishful thinking that the fluctuating stresses of a boat in motion will not also cause distortion. Hammering tension stretches the rivets, releasing compression on the joint. Leaks soon follow.
Self-tapping screws are hardly an improvement. These are designed to cut threads, but at the expense of the fiberglass they shatter and crush. The result is threads that are too weak to sustain the load. In addition, unless the holes in the top half of the joint are drilled to a larger size, tightening does not draw the two halves together. Some builders back the joint with wood to give screws a proper material to grip. This can work as long as moisture never finds its way down the fastener, not necessarily a good bet in my experience.
The only seaworthy way to mechanically fasten a hull-to-deck joint is with through-bolts or with machine screws threaded into a metal backing plate. Through-bolts should also have a backing plate, or at least a large washer to spread the load. Spacing of the bolts should be close enough to prevent the flange from scalloping, which will allow the seal to fail.
The hull-to-deck joint exists only because molding a fiberglass boat in two pieces makes practical sense, but once the two halves are joined, one would expect them to remain joined for the life of the boat. With good design and competent execution, that is easy enough to achieve.
The All Important Seal
So if the joint is by definition permanent, what is the concern? The seal. The deck joint must keep out the ocean, the rain and any other moisture it encounters. Unfortunately, deck joint leaks are all too common. It is easy to identify a cause when the joint is fastened with rivets or screws, but why should the seal of a through-bolted joint fail? I call your attention to the Challenger space ship. Despite the fact that NASA spent millions of dollars designing a leak-proof joint, one cold day in January, it leaked, with catastrophic results. Under stress most materials will stretch, twist, distort and separate.
All deck-joint leaks have the same cause: the seal has lost contact with one of the surfaces or with a fastener. In pursuit of a permanent seal, today’s boatbuilders mainly use a high-strength adhesive sealant in the deck joint. This is no doubt a net plus for the boating world, but not such a good thing for the boatowner with a deck joint leak.
Some joints are more attractive. Some are better at deflecting rain and spray. Some can even protect the hull from impact damage. At sea, however, the only two requirements are that the joint is strong and watertight. Even a little water below does damage to a boat, not to mention the morale of those onboard. If the deck joint on your boat fails to pass muster on both counts, it requires corrective measures.
Deck Joint Repair
Because deck joints are double thickness and typically oriented horizontally in I-beam fashion, they are one of the toughest areas of the boat. Even the vertical shoebox joint is likely to be reinforced with a sheer clamp inside and a joint-hiding rub strake on the outside. As a result, severe impact damage to the deck-joint is unusual on sailboats (with the exception of storm damage).
In the event of damage to the deck joint, the question arises: is one type easier to repair than another? Personally, I think the answer is no. As a practical matter, repairs to deck joints are rarely made by rebuilding the flanges and then fastening them back together, as there is no reason to treat the boat as two halves. The repair is likely to be reconstructing the damaged deck and hull together without a joint in the area of the repair. That makes the type of joint that was there originally moot.


