

The original saloon table in my Down East 45 schooner was a single heavy sheet of 3/4in laminated plywood, 27in wide by 57in long. It was supported on two substantial aluminum pedestals locking into a set of large round collars screwed to the sole.
There were two annoying problems with this “structure.” First, it was permanently mounted on the port side of the saloon in such a way that people sitting on the starboard settee couldn’t reach it. Second, it was difficult to squeeze in and out at the aft end, because of the chart table bulkhead being in the way. The result was a very substantial but also very impractical arrangement—impractical enough that I eventually decided to build myself a new, more versatile table from scratch, one that could, among things, seat more than three people.
My new design would have a narrow fixed center section, with hinged leaves to either side that would swing up to reach the settees to both port and starboard. The ideal table height given the height of the settees is about 28in, which meant the two drop-down leaves could be no more than 27in wide. Otherwise, they would catch on the floor when hinged down. Positioning leaves of this width so that they would reach the settees left a 13in space in the middle. This became the width of the fixed center section. The new table would be just 43in long.

Getting Started
I started with a 4ft-by-8ft sheet of oak plywood, which I got from Lowes Hardware for $54. The good people at Lowes also cut the sheet to the three-panel sizes I wanted on their circular saw, saving me a lot of time and trouble, as it made it possible to fit all three pieces in my car. To get the rounded corners I wanted I used a round tin lid to give me a radius and then cut the corners with my jig saw and a fine scrolling blade.
I decided to laminate the tabletops with a Formica type melamine laminate that is both hard and scratch-resistant. I found exactly what I wanted on the Wilsonart website (willsonart.com): a realistic-looking teak-grained laminate called Nepal Teak, which with its high-gloss finish looks just like the real thing and which I was able to special order from Lowes for $94. When it arrived, I cut the 3/64in-thick material to the approximate size of each table section using metal cutting shears, leaving a 1/2in overhang all round. I then glued the three pieces onto the plywood using Weldwood “original formula” contact cement. Joining large surfaces of laminate with contact glue is a one-shot process with zero wiggle room, due to the fact contact cement bonds instantly. To make sure I got it right I placed each laminate piece on a bench glue side up, then laid a thin wooden batten at either end before putting the plywood on top, glue side down. The purpose of the wood battens was to keep the two pieces apart as I located the plywood accurately above the laminate. After that, it was a simple matter of sliding the battens out of the way and pressing down on the plywood to join the two layers. I then placed the boards on some paper on the floor and walked all over them in my deck shoes. This applied the 75lb pressure called for in the gluing instructions and then some, firmly pressing the pieces together.
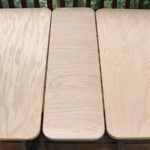
The three new table sections with their corners rounded off
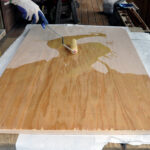
Applying the contact cement to the plywood with a roller before securing it to the laminate
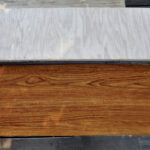
The central plywood panel and veneer prior to joining the two with contact cement
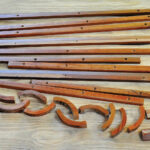
Various bits and pieces of leftover teak served for making the trim pieces
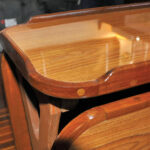
Fiddles surround the new center section to ensure nothing goes adrift if left there in a seaway
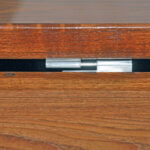
A close-up of one of the leaf hinges the author used
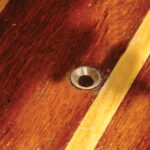
A close-up of one of the cabin-sole bushings
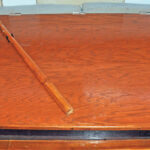
One of the legs used to support the two hinged leaves when they are deployed
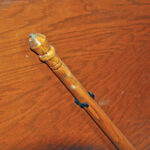
A close-up of one of the pins at the end of the legs; note the C-clip used to secure the leg to the bottom of the leaf
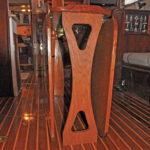
The support at the forward end of the table’s center section, also hinged
Bits and Pieces
After setting aside the boards overnight so the glue could cure, I carefully trimmed the laminate flush with the edges of the plywood, using a router with a vertical cutting bit and roller bearing guide. This produced a sharp edge to which I intended to fit teak trim all round.
I had some 1/2in thick teak slats leftover from an earlier rebuild of my forward cabin that were just right for making the straight edge trim for the panels. These, of course, were much too thick to bend round the corners, so I used my jig saw to cut the necessary rounded trim pieces from some other bits of teak I had sitting around. All the trim pieces had to be drilled and counter bored, then screwed and glued to the edges of the three boards. The 75 holes had to then all be plugged and sanded.
I decided to add fixed fiddles on the center section, because things invariably get placed there that are liable to slide off as soon as the boat starts rocking, even in the marina. To do so, I cut the requisite strips to length, beveled and rounded the tops, and then shaped the ends in a graceful swan’s neck curve to join the corner trim. I left the corners open to make the table a bit easier to wipe clean and also add a bit of decorative accent. To finish things off, I also rounded the undersides of the flush trim pieces while leaving the tops square.
An unusual challenge I didn’t anticipate was keeping track of all the trim pieces after they’d been shaped and matched to their requisite edges and corners. I made 12 corner pieces, four edging strips for fiddles and eight other edging trims. All were slightly different, because my new table is nothing if not hand-crafted. Lesson learned.
Putting it all together
With the leaves done, I hinged them to the center section using a half-dozen stainless steel sliding pull-apart hinges—three to each leaf. These also allow the leaves to be easily detached from the center section when necessary, for example, when I need to access to the floorboards.
The mainmast compression post on my schooner consists of a 4in-square post passing through the saloon to the keelson, thereby offering the perfect support for the aft end of the table’s center section. I used a 4in brass-plated butt hinge to connect the two, screwing one half of the hinge to the compression post with a teak block spacer, and the other half to the underside of the table. This allows the center section to hinge upward where I can use a strop to hang it from a deck beam to keep it out of the way. I can also remove the table completely, by simply knocking out the hinge pin.
To support the other end of the table I shaped a leg out of plywood, which I then hinged to the table with a short piano hinge and spring latch. This allows the leg to fold flat to the underside of the table center section whenever the latter is hinged up and out of the way. I located the bottom of the support with two pins that set into a pair of flanged bushings in the sole. I made the pins by screwing 1/4in diameter stainless wood screws into the bottom of the support, then hack-sawing the heads off and rounded them with a file.
To support the leaves I bought two attractively turned white wood table legs, grandly termed “Early American table legs,” from Lowes for $6 a piece. I fastened the top of the legs to the underside center edge of the leaves using a small brass hinge, so when not in use they fold up against the leaves where they are held secure by a plastic C-clip. I also screwed some 1/4in-diameter pins into the bottom of each leg which drop into another set of bronze bushings sunk into the sole. This makes for a simple yet secure support for the table leaves—an arrangement that is far stronger than trying to support them from the center section as I have seen on other boats, an arrangement that nearly always allows the leaves to sag. I also bought two brass barrel bolt latches from Walmart for $2 each, which I screwed to each leaf. The bolts both drop into the flanged bushings set in the sole to stop the leaves swinging about when in the folded-down position with the boat underway.
Finally, I stained the white plywood on the underside of the panels and the table legs with a teak stain that, when rubbed in with a rag, makes the wood look amazingly like real teak. The stain I used (which I bought from a local hardware store for $15 a quart) is made by Zar (ugl.com) and called Teak Natural 120. After that, I gave everything a couple of coats of Epifanes high-gloss wood varnish. It’s now is difficult to distinguish between the real teak trim and the laminate.
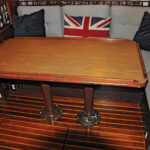
With both leaves extended my new table now looks positively baronial, with room enough for six and then some. When the leaves are down, though, it is smaller than the original and allows access all round. A vast improvement by any measure!
Materials and costs
Plywood sheet for table $54
Laminate for tabletop $94
Support legs for table leaves $6
Five (5) flanged bushings $15
4in hinge $4
Teak wood stain $15
Two (2) barrel latches $4
Detachable hinges for leaves $30
Sundry screws, glue, clips $10
TOTAL $232
Photos by Roger Hughes
January 2021


